We assume from this step that you already know how to create email in your cPanel account, if you don't yet know, then read this article
How to Create Email in Your cPanel Account
After you must have created your email account, is now time to connect this email to your Gmail, Yahoo, OutLook or to any mail app, where you can easily manage your email. This is very important especially for start up Business.
Step one: Go to the email you want to connect to Gmail and click on connect device

Step two: Take note of these vital informations
You Username, Your password, your mail server, which is mail.yourwebsite.com, POP3 Port : 995, SMTP Port 465
Use SSL/TLS settings if your website has https, or a secure connection.

Step Three: Go to your Gmail account and Login to your account.
1) After Login into your Gmail account, Go to account setting located at the Top right side of your page, you will see the geer iCon, click on that to open Gmail account settings.

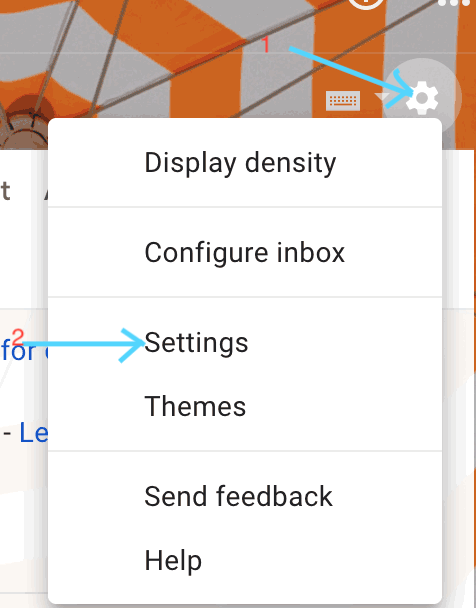
2) Now click on where it says Accounts and Imports.

A) CONFIGURE INCOMING EMAIL
When a customer send you email using your business email, you should be able to receive it from your Gmail account.
3) Look for where it says Check Mail from other account, then click on add a mail account

4) Enter the email address you want to add, then click next to continue.
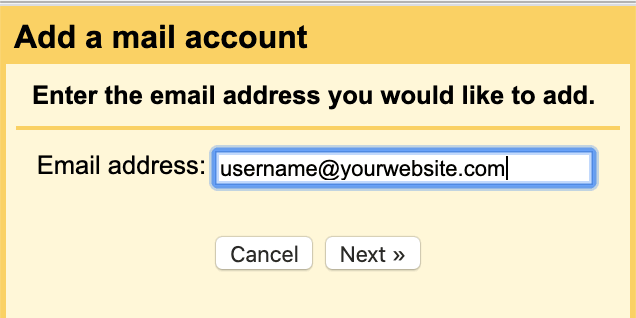
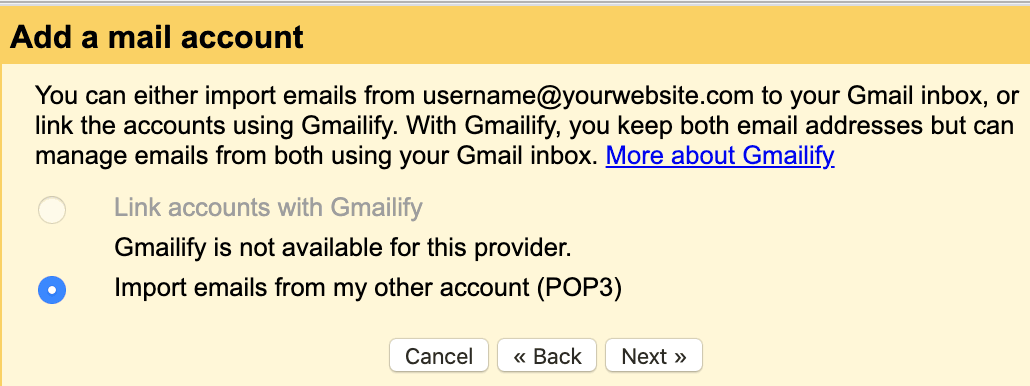
5) Click on Next to Continue.
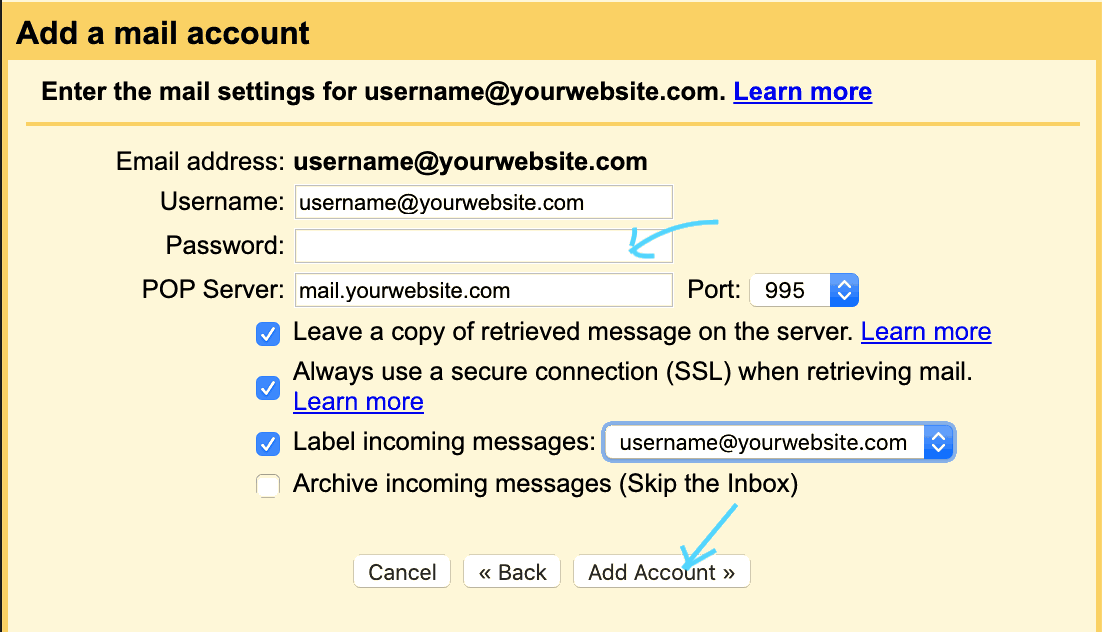
6) Enter your username (which is your email address) and password (password you used when creating your email). In case you have forgotten your password, You can always reset it in your cPanel account from the email you created.
- It is always very important to leave a copy of your emails in your cPanel, so that in case something happens to your present emails, you can always login to your cPanel account to retrieve it.
- Is highly recommended to always use a secure connection when creating email, to protect yourself from hackers. This is possible if your website has SSL certificate enabled. For secure connection use Port 995, and for no secure connection use port 993
- Labeling incoming emails, enables you to know the email via which the message was sent.
After you must have entered the various information, click Add Account to continue.
You are now setting to receiving incoming email.
B) CONFIGURE OUTGOING EMAIL
You as a business or individual should be able to send email via your Business email account or reply using your business name, and not your Gmail account.
1) Go to where it says Send mail as, then click on Add another email address, to configure your email.

2) Enter email information, you can enter your name, if the email refers to you, or enter the name corresponding to the right department. Also enter your email address. Don't forget to tick treat as alias. learn more. when you have entered the various information, click on Next Step to continue.

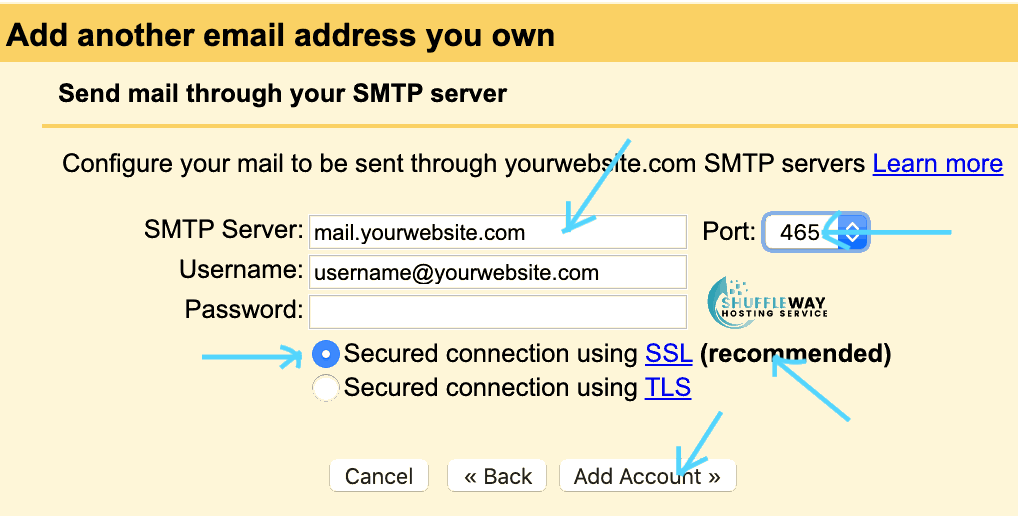
3) Enter your SMTP server name which usually begins with mail, followed by your website name (mail.yourwebsite.com), username which is the email address ([email protected]), Port 465, and the password of the email address. Always use a secure connection using the one recommended by Gmail.
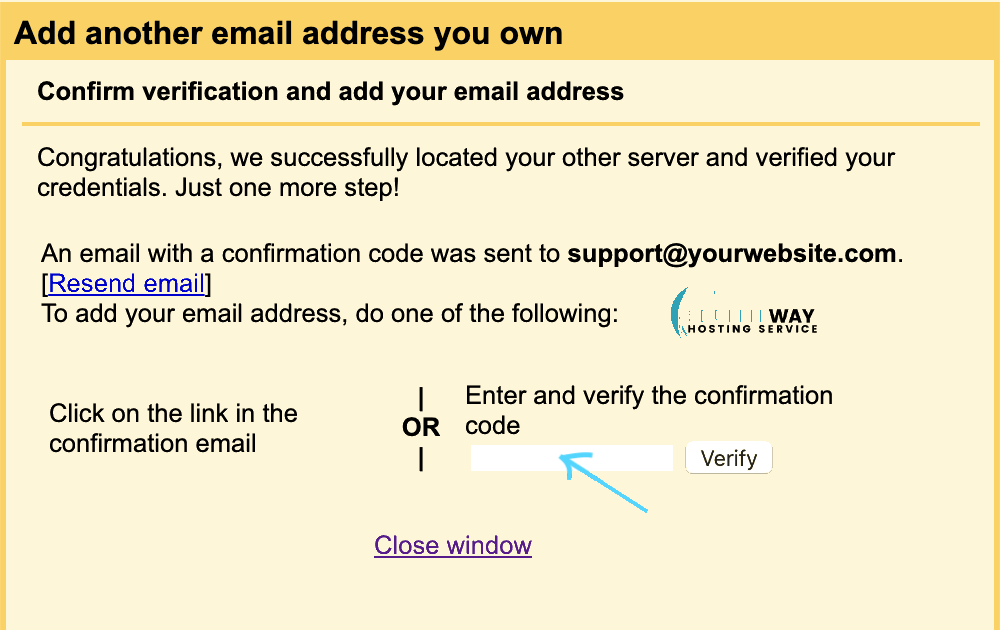
4) Enter your verification code. To do that, Go to cPanel, and check your email, copy the code and paste in the box, then click verify. You have now successfully configure your email address.
In case you found any issues, with this configuration, contact us, or leave a support ticket and we shall be glad to assist you.

